In our second workshop of lighting we were asked to produce a piece of practical work, based on the quality of lighting, and how this effects the overall video created.
"quality is about the intensity of the illumination. There are generally two ways of describing the quality of light "hard" and "soft" although most situations fall between the two".
 |
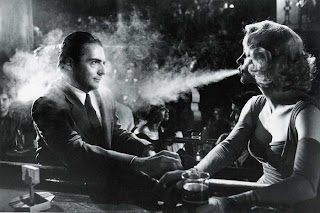
this is an example of hard lighting, where crisp textures and edges are shown on the outline of her face. |
Definitions:
"Hard" lighting- direct light creating bold shadows, crisp textures and edges.
"Soft" lighting- Indirect or diffused which blurs contours and textures, softer contrast between light and shade.
"Flag"- A piece of flat wood, cardboard or other material used to shield the camera lens from unwanted light sources.We were put into groups of 5 and were asked to allocate roles, as to which each person wanted to be. The roles were:
- Director- coordinates the group to achieve the experiment.
- Camera- Set up and position of the camera, and record evidence
- Clapper-Writes "boards" to notify the audience what they are watching. Also helps the recorder
- Recorder- Notes down the experiments variables and monitors decisions and revisions made.
- Gaffer-Positioning of light and equipment
- Character in the scene.
 |
| here is an example of soft lighting, which is shown on her neck where there is a mixture between light and shade. |
ideas we had and how we would make it work. The director thought of an idea which would demonstrate the different shades of lighting from soft to hard lighting. We created small shots using different diffuser's and a flag.
Equipment and set up:
As the recorder it was my job to draw out a birds eye view of the room showing where we positioned our equipment. Below is the drawing i created of the room.
Predictions:
The group predicted that we would be able to show the difference between hard and soft lighting by showing the other group how different they both are and how it effects the quality of the shots.
Other predictions that were made was we thought that the different diffusers we put on would effect the quality of the light.
Factors to change:
As a group we decided that a number of factors would need to be changed which would effect the quality of our production, and the quality of light. These were:
1) The lighting variables will need to change- we felt that we could have been more professional and better planned.
2) The direction of the camera, and distance of the light will need to change, to show different lighting effects and shadows created.
3) The positioning of the camera- Due to the difficulties we had with the camera on our first attempt, we decided to move the camera to a suitable place where the lighting could be established and shown in a good manner.
Factors to measure:
As a group we had to measure the effect that different lighting techniques had on the quality of the images we created.
We also needed to measure how much lighting we wanted to use and plan effectively the effects what we wanted to create. In my case it the the quality of the production.
What will stay the same:
 |
| We also used barn doors in our experiment |
Factors that will remain the same throughout our clip will be the positioning of the light. The light will need to be in the same place in every shot, so we will be able to recognise the different types of lighting, and see a huge difference within hard and soft lighting.
Below is the video we created. We wanted to show the difference between hard and soft lighting which is not very clear when you watch the video all the way through, the best case is to stop it at the different shades of lighting.
Strengths and weaknesses of our experiment:
Although it is not clear the see the different lighting shades when you watch the video all the way through, we felt that we completed the task set, at the best of our ability in the amount of time we had. When presenting it to the class, we stopped it at different times when we were using different diffuser's to show the class the contrasts between hard and soft light. By doing this, the class did see a clear difference between the two different lighting shades, and the effects quality has on it.
However, when having a group discussion after our experiment, we came to the conclusion that if we were asked to do it again there would be a number of factors we would change:
1) We filmed with the camera out of focus, instead the camera was focusing on the laminated board instead of the character in the scene. The camera did not have time to focus on Anton after the laminated board was out of the scene, as our shots were incredibly short.
2) Length of film- We felt that we should have filmed for longer, and the shots were too short to distinguish the difference between the quality of light. Again connected to the camera being out of focus.
3) Planning and use of camera- Overall as a group we needed to engage in more discussion and planning throughout the whole process of this experiment.
 |
| the blinds effect |
4) Blinds- The blind effect did not really work in terms of creating shadows, and it was not very clear to see what we were trying to achieve with the blinds. Instead, we should have created the blinds with cardboard instead of thin paper.
6) Explore the use of flag's further- The positioning and effects, if we had more planning time we could have achieved this.
Our whole production was very intense, we did not have much time, and it was rushed. However, we felt as though we achieved a good job in the amount of space, and time we had.
This workshop had particularly helped me in learning more about the lighting in production in films and its importance to the production. In production time we will need to consider the lighting and what different effects we want it to have on the mood, representation of characters, type of day e.t.c: Rather then just turning the lights on in the room when filming we will now have to give more thought to the process
Direction
The other group's experiment was about Direction. They had to show the direction of light through different positioning of lighting, and the different directions and props. They used foil to create a particular effect of the direction of the lighting.
The group presented to the class their experiment and explained what they did and how they can show the effects of direction.
They used a lenzflair, where light is shown in the shot, and distracted the view of the object. Also they used barn doors to show the manipulation of direction, and some lighting showed soft edges, where there was an intense point of light.
Carolyn said that where there is the strongest point of light, it creates hard cast shadows.
A tunnel lighting effect and a tunnel barn door effect was mentioned where the 2 sides of the barn doors are closed, and this reduced the amount of direction on the light as the Barn Doors brought all of the light in.
Below is the video that the direction group created.
 At 3 minutes 56: The position of the light changed and showed a cast Shadow. The main Shadow is coming from the left, and it created hot spots on the character.
The lighting was positioned at the same height which only changed the direction of the light.
The tin foil effect which was positioned over the light created a soft cast Shadow.
The tin foil creates a cast Shadow onto the white board in the background, but darkens the overall shade of lighting.
 |
| tin foil effect |
The cast Shadow is soft, showing that the object (character) blocks the light creating a Shadow behind them.
 |
| white sheet effect |
Cast and attached shadows are produced due to the white sheet, for example: attached shadows can be shown in the creases in his shirt.
Cast shadows can be shown on the left side of his face just under his eye.


